
Editor’s Note: The following is a guest post from Drift Partner Molly Duggan. Interested in contributing content to the Drift blog? Email Gail Axelrod at gaxelrod@drift.com.
If you’re not familiar with Drift and conversational marketing, it’s a new way for marketers to engage, educate, and guide website visitors. Drift helps you qualify leads faster while creating more meetings for your sales and marketing team through conversational marketing. If you’re already on-board with Drift and are looking for new and innovative ways to use the platform, you’ve come to the right place.
As marketers, we understand that the customer journey for an event often begins on your website. This critical first impression — where the event is publicized and attendees register — should be as frictionless as possible.
Today, we’re reducing friction in the event awareness and registration process by orchestrating conversations through Drift. In this blog post, you’ll learn how to use Drift to gather registrations and send automated email confirmations with calendar links, event reminder emails to contact segments, and post-event thank-you emails.

So how do you create an event workflow in Drift? We’ll break it down step-by-step.
1. Create the calendar event
Creating a public calendar event is probably the most important step you’ll take. This step provides your visitors with a simple way to quickly add your event to their calendar. Get started by creating a calendar event on a public calendar. For this example, we’ll use Google. Once you’ve created a calendar event, save the .ics files to your CRM. Be sure to also save Google Calendar public links. And because every system is different, run a quick Google Search for “Insert calendar invites into marketing emails” to make sure you know exactly how to do this for your system. Lastly, save your .ics files in your CRM, get a link to the files, and copy/paste your other calendar links (e.g., Google) safely.
2. Create a custom email playbook
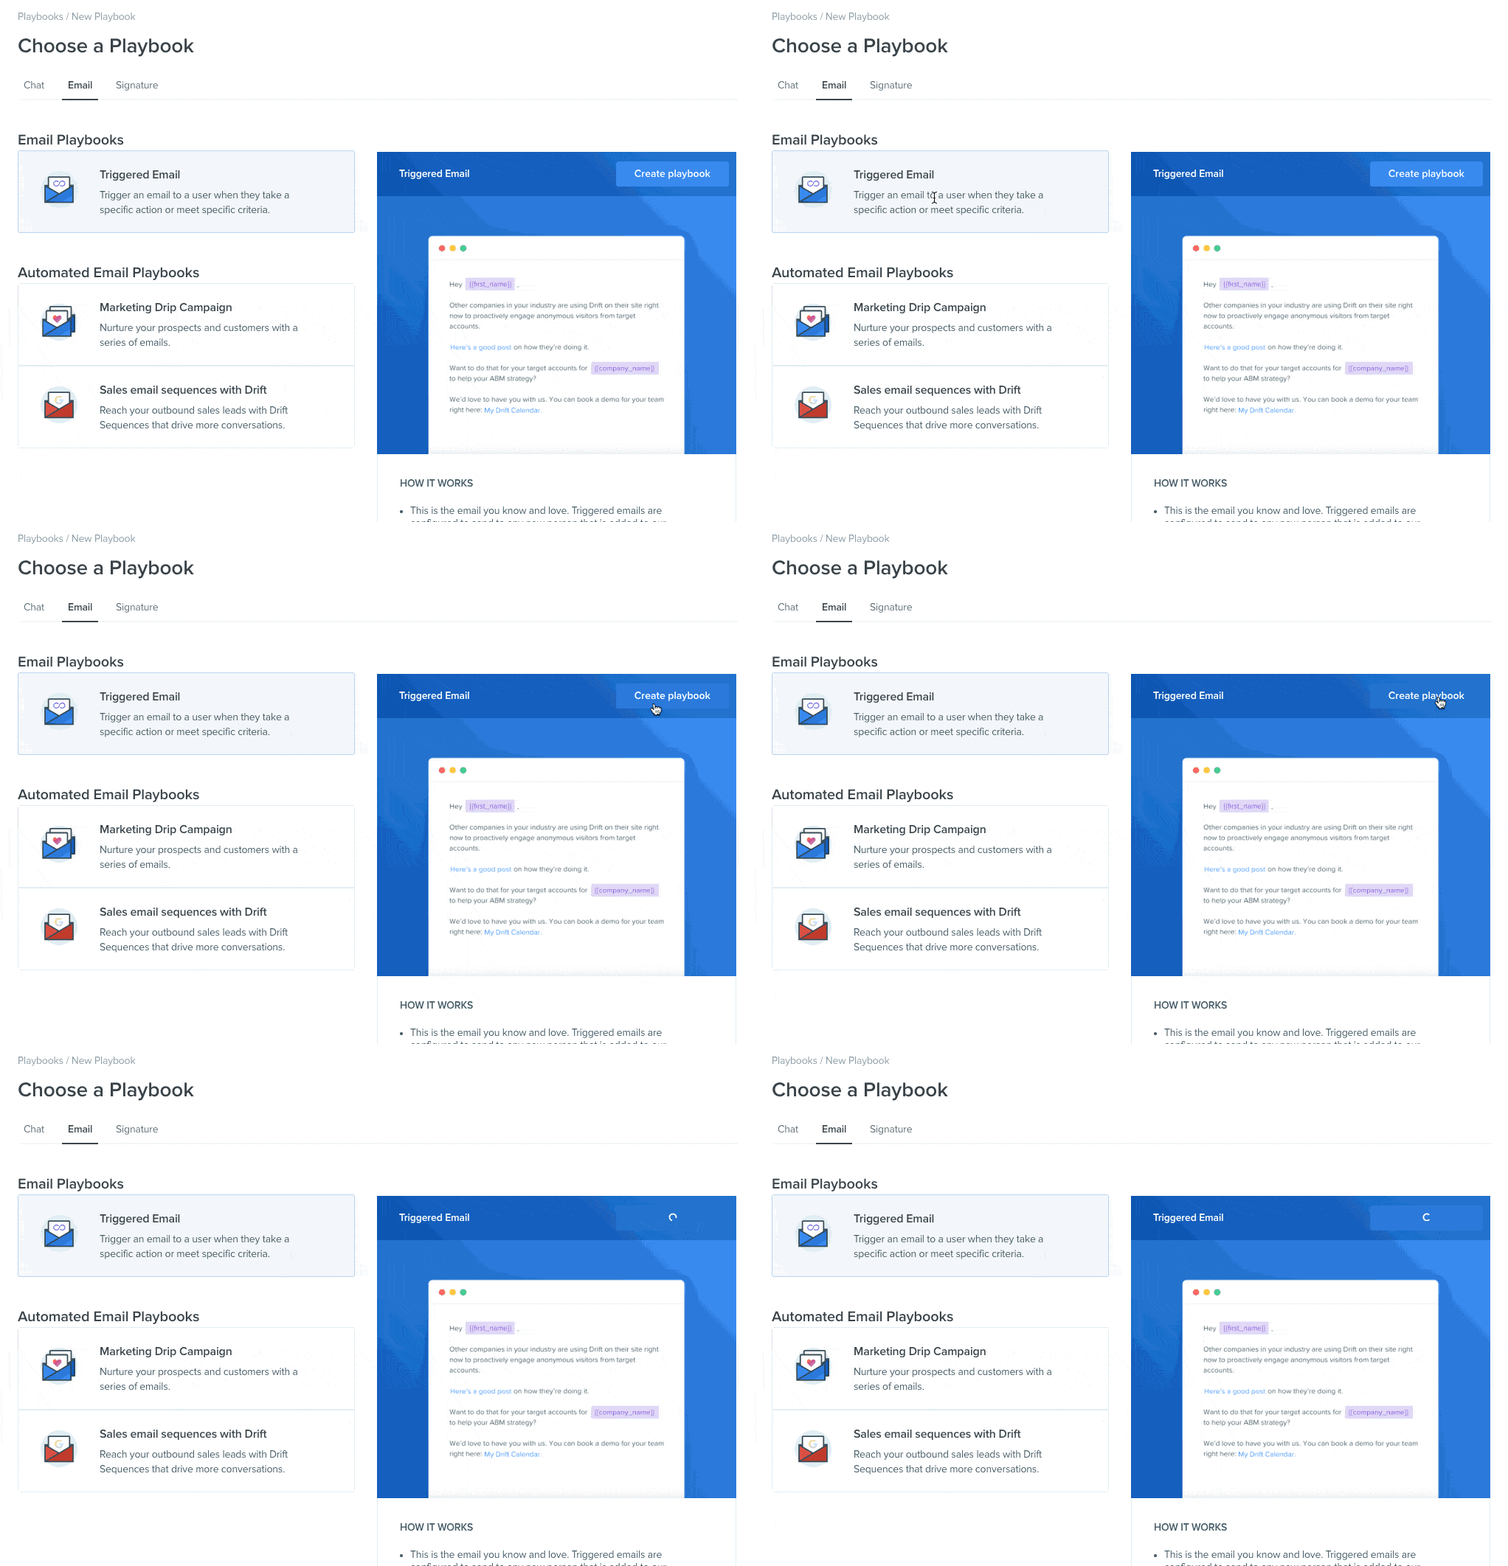
Next, go to Drift by creating a custom triggered email playbook that sends an automatic email confirming the registration (New Playbook > Email Playbook > Triggered Playbook). Don’t forget to publish and turn on the playbook.
3. Create the chat playbook
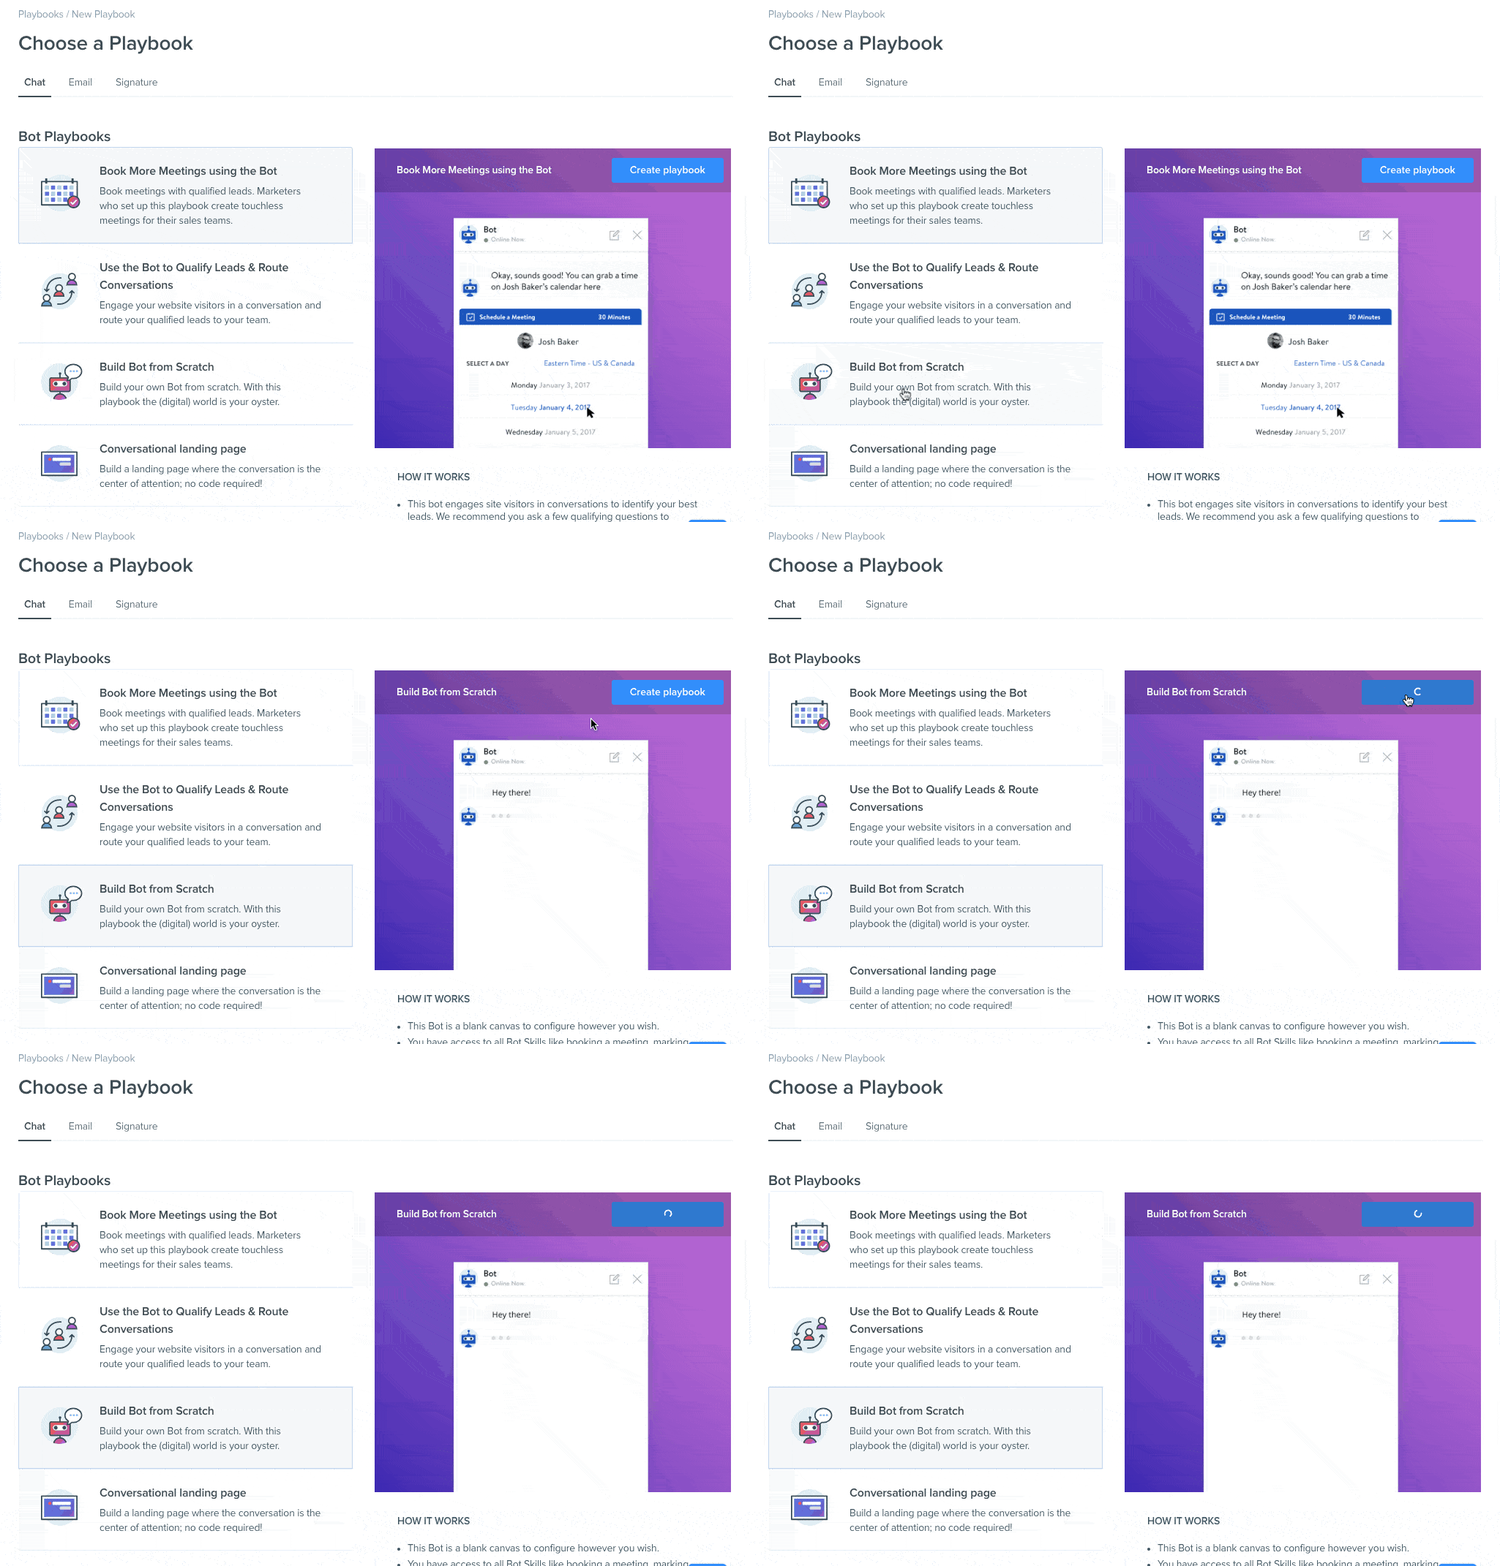
Create a custom chat playbook that gathers an email address, and any other information you need (New Playbook > Chat Playbook > Build Bot from Scratch).
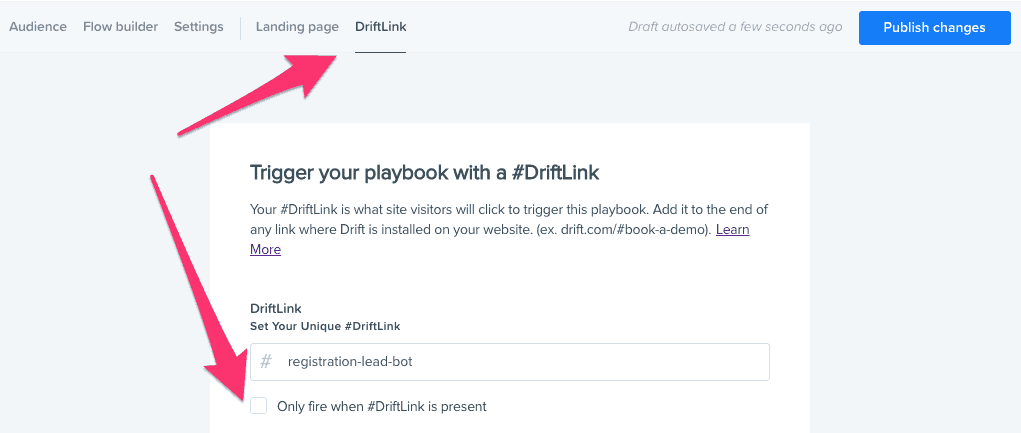
Hint: If you want to keep the event B2B, prevent visitors from using personal emails. This feature creates a small barrier that shows you’re looking for business registrants. If you want to trigger the bot on a link only (Register Now button), you’ll want to click DriftLink in your playbook and tick the box “Only fire when #DriftLink is present.”
4. Create a custom contact attribute and update after successful email submission
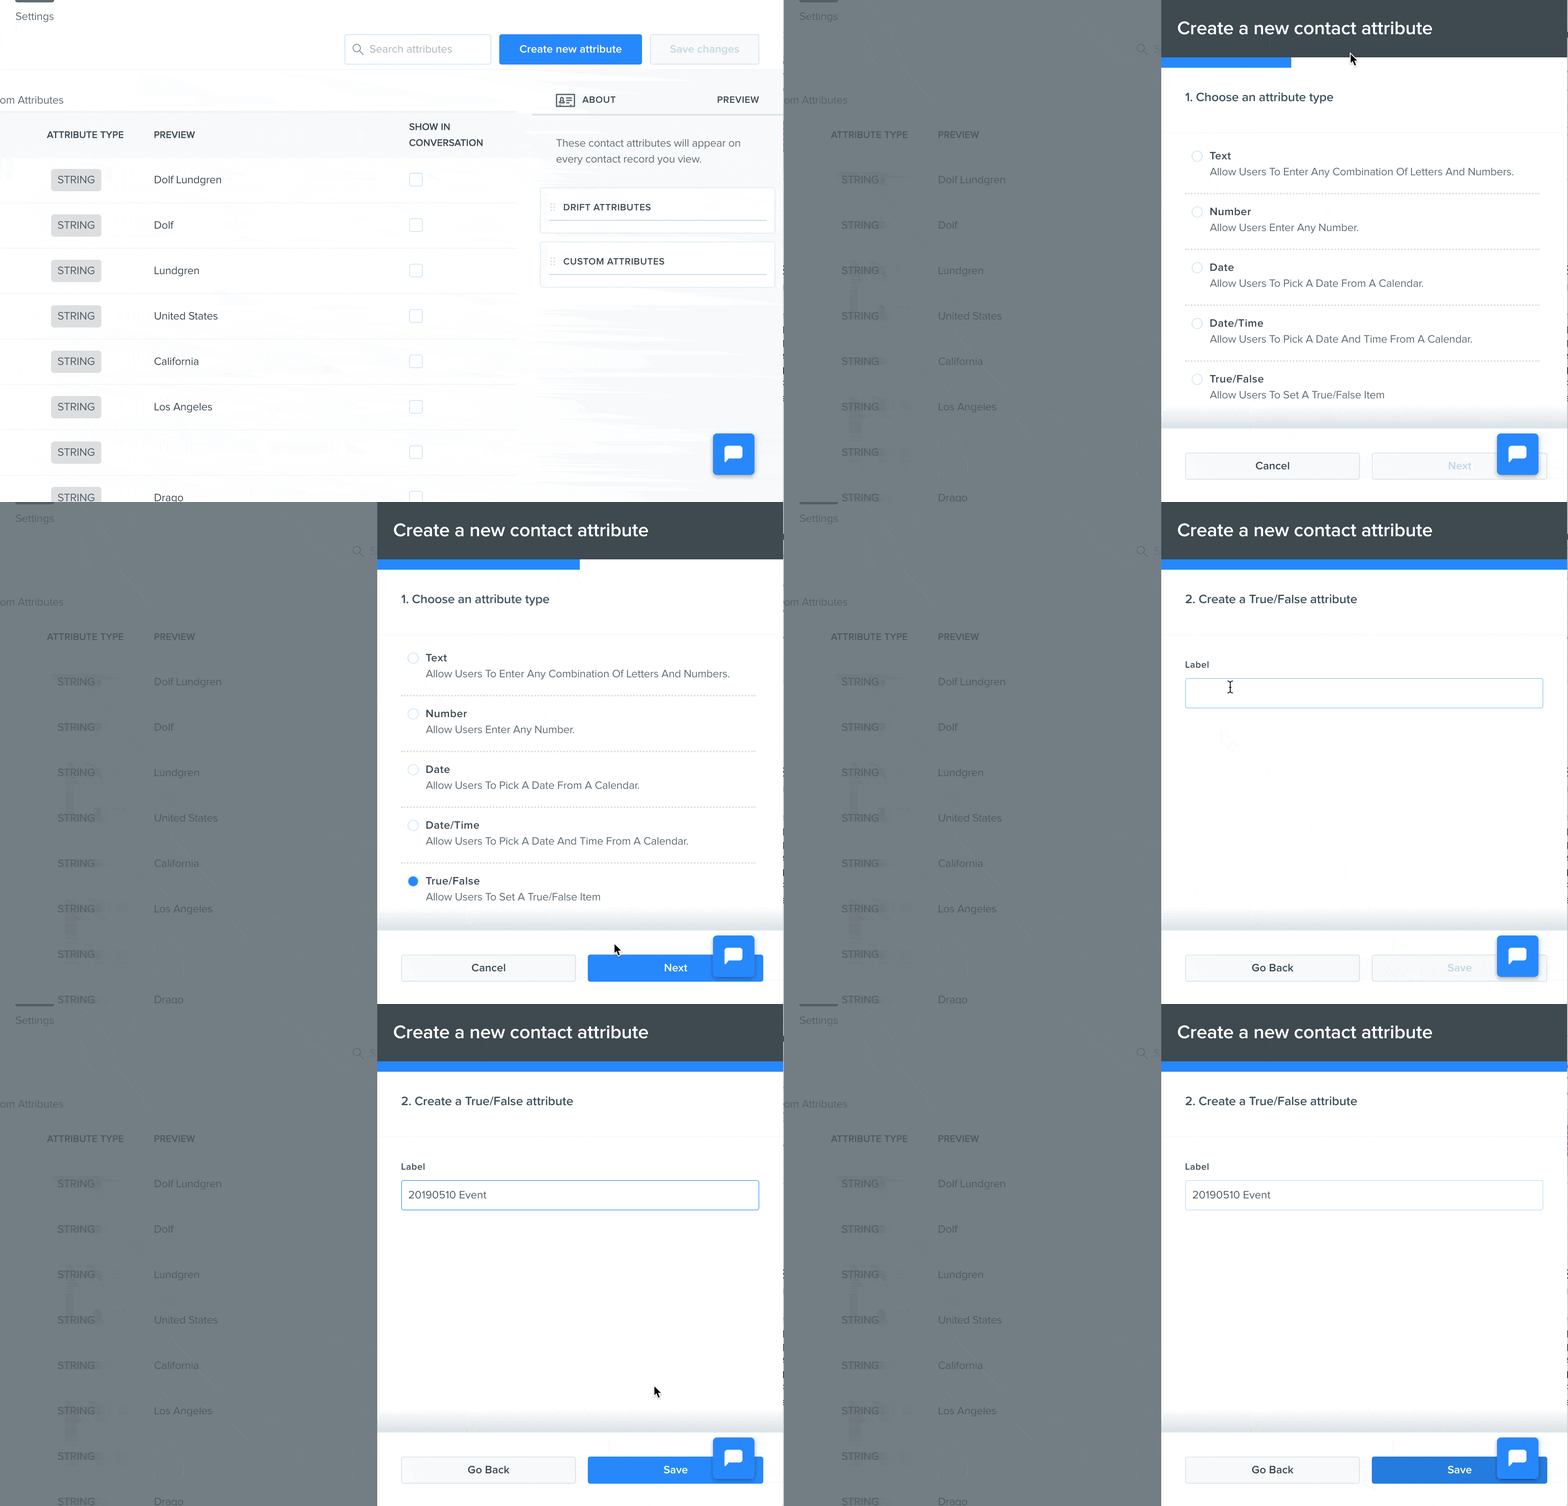
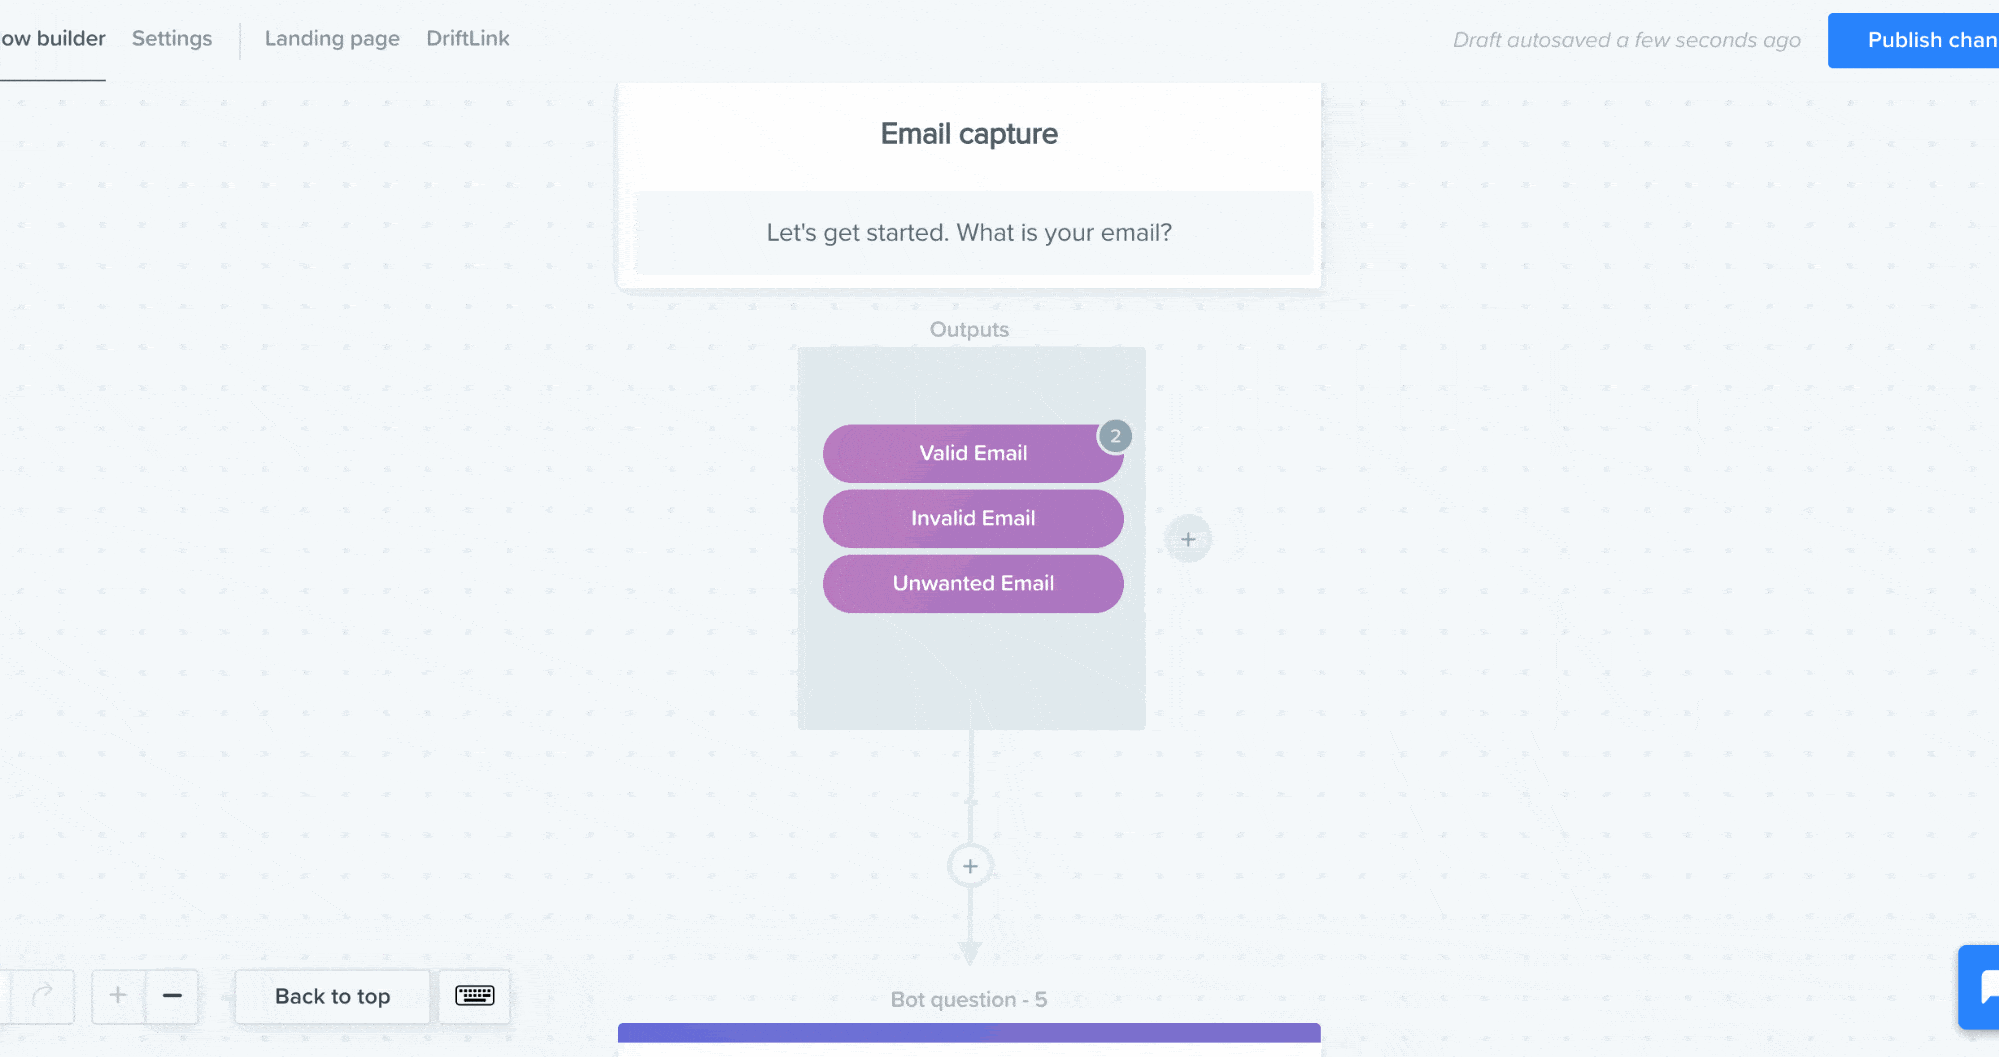
On the successful capture of an email, let’s update a contact attribute with a unique identifier. We’ll use this contact attribute in a future step. First, you’ll want to create a custom attribute at Contacts > Settings > Create new attribute. For events, you may want to use the true/false boolean attribute.
Next, go back to your playbook and click on the Valid Email button. Apply the contact attribute you just created. It’s important to add this custom contact attribute after a valid email has been submitted so that the visitor can be added to the email drip campaign later.
5. Create a trigger that sends the email from step 2
Right after capturing the visitor’s email address, create a trigger that sends the email you just created.
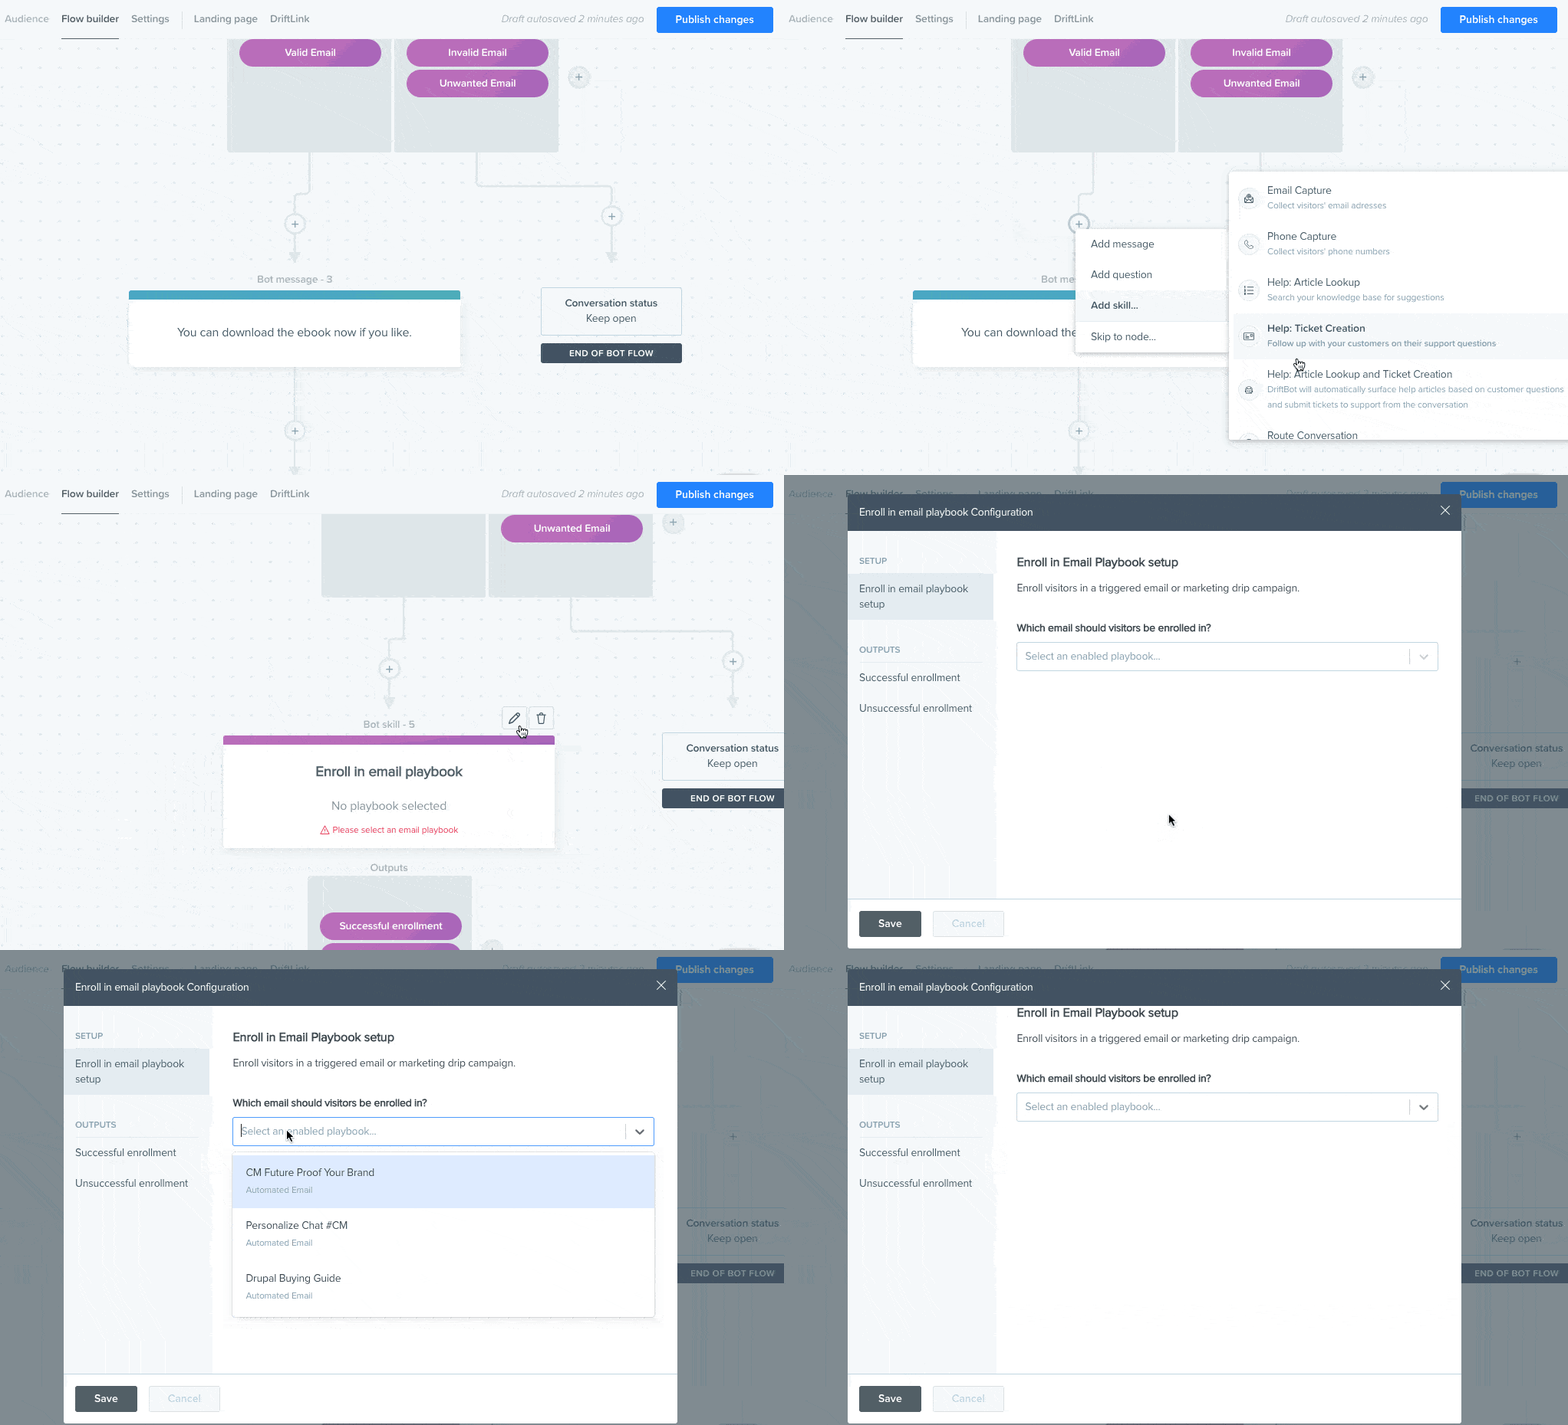
Publish and turn on your chat playbook.
6. Segment the registrants for your drip campaign prior to the event
Next, we’ll segment the registrants. Click Contacts in the Drift main menu and click the blue button, New Segment > New Contact Segment.
- Use the filter to select attributes and type or select the attribute you created in step 4 above.
- For our example, choose attribute > equals, select True and click Apply filter then Create.
- Type a unique Segment name and choose Dynamic and then click Save.
7. Create a marketing drip campaign to send reminders and pre-event actions
Create a marketing drip campaign playbooks (New playbook > Marketing Drip Campaign > Create Playbook) that you’ll send before the event and send them a predetermined number of days before the event so that at least 1 or 2 emails are sent as reminders. This is your opportunity to gain excitement and possibly more attendees via sharing. Be sure to add a post-event email for the day after the event to thank your attendees and include a copy of the presentation or the video from the presentation. Important! To send the marketing drip campaign to the right audience, choose your audience segment from step 6 so the right people get your message. Set a personal calendar reminder to enable and send the campaign.
Now that you’ve done the easy work of creating the workflows and playbooks, it’s time to put on your awesome event.
If you have any questions about the details of creating playbooks, please feel free to send a message to Erik at erik@mollyduggan.io, tweet me @erikcochran, or get a conversation orchestrator to help you today.


